Permalink to here: http://j.mp/2xAoIRw
Offline look at and optimize your photos with Picasa (or any other program or not at all …). In case you edit a picture, “save” it right back to disk with Picasa (right mouse menu in the picture). Note the picture names and or numbers on a piece of paper.
Go online to your Google photos (just google “Google Photos”, you’ll end up at your account!). Select Albums and create a new one (“+” album), adding any one picture as a dummy. Store the album. Open and name the album. (I add my e-mail as imprint.)
With your new album in view click the share icon and ask Google for an internet link to the album, like https://photos.app.goo.gl/FX29jRkhfRP7Ch5WA. Copy the link. Open a fresh tab in your browser and use the copied link to verify*).
Optionally have bit.ly give you a short link (I use the browser extension “Bitly | Unleash the power of the link”) like http://j.mp/2N9EZA5.
 |
| Adding multiple pictures to an album |
Enlarge or compact the album view by Ctrl+ or Ctrl-. Be sure to refresh the browser image of your album when you miss an added picture.
Enjoy the view!
*) To check public availability use “private” browsing. Ctl-shift-P in Firefox. (When you work with Google Photos you must be, you are loggend into your Google Photo account, the viewer won’t be.
As to my experience Google won’t index your albums or pictures. The pictures nor the captions will not be generally available! To see them you must have the cryptic key created by Google like https://photos.app.goo.gl/FX29jRkhfRP7Ch5WA here (or its short link http://j.mp/2N9EZA5).
To avoid machines indexing my albums, I publish their access URLs in the web only human-readable like writing “click http://j.mp/ and then directly add 2N9EZA5”, see www.Joern.De/Fam (German).
——————————————
Local Picasa used to be able (until March 2018) to upload pictures to Google photo albums.
You marked your photos – if edited or not – within local Picasa and sent them to Google Photos (»Fotos« in German). Here’s a screenshot of (local) Picasa, bottom lines:
 |
| The marked pictures (note the green dot) at left. The large green button to upload to Google at right, now a dead ending |
 | |
| »Albumliste konnte nicht geladen werden« or “Failed to download album list” |
Now here’s a (crappy) “solution”, shown on an album with three pictures.
If it’s just a few pictures: note them down on a piece of paper and go to point 2, directly to Google Photos. But don’t forget to store eventual Picasa editings, see below.
For a more organized process with larger albums continue here.
1. You first assemble the pictures (that you want in a Google Photo Album) into a local Picasa album.

You’ll get a popup like this:


don’t forget to save, i.e store Picasa’s changes to the selected pictures back onto the original files! Otherwise your edits will be lost to the world.
 |
| Here the “Store” symbol, the little floppy disc on top, asks you to save Picasa’s edits. |
 |
| At left: “Album selected – 3 photos” |
 |
| You can select where the (still local) “album” to be should be stored on your PC, in my case it will end up in E:\Bilder\201805\Test, a subfile of my current picture folder. Another good choice is some temporary place, as this album will contain duplicates – Better leave picture size original at this point (my mistake here). |
Hit Export (Exportieren) at lower right, and watch Picasa copying your selected pictures to just this place on your disc. Check with your Windows Explorer, if you like.
In Picasa the new folder will appear under “Exported Pictures” (»Exportiete Bilder«) , incidentally:

You are now ready to create the album in Google photos. »Juhu!«

 |
| First look at my Google Photos. Note the picture from science fiction. Gestern = Yesterday |


Sidetrip: This is the moment you’d like to check, in what size Google uploads and stores your pictures. From the top left menu in Google Photos click ☰ (a trigram or Hamburger button), select Settings (see screenshot here at left: »Einstellungen«).
Then – right screenshot – select “High Quality” (free unlimitesd storage) rather than “Original”.
In Google Photos you have the option of uploading selected pictures:

 |
| Erstellen = create, Hochladen = uplaod |
Windows Explorer will now let you easily mark all the pictures from your freshly made extra album, in my case three pictures.
After the upload Google photos will show you:
 |
| 3 Elemente hochgeladen. Three elements uploaded. |


This rather unpractical “new” procedure (compared to Picasa uploading the pictures) has the advantage, that you now can upload videos along with your pictures. Picasa had lost this capability a while ago.
Note the white check mark ✓at left in the blue ribbon. Do check it when done editing the album.

 Usually I share the album, share button (the middle one as shown at left) and ask for an Internet link (see at right).
In this case I got
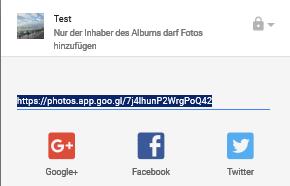 https://photos.app.goo.gl/7j4lhunP2WrgPoQ42
For convenience I add this link to the album title for easier sharing; I even add a shortened link … and my Name. And more, see there … Please spread around.
Thank you for reading. And thank all who tried to make Picasa usable for web album despite Google’s sabotage, like, especially “Rinus”.
Reference: https://sites.google.com/site/picasaresources/Home/Picasa-FAQ/google-photos-1/how-to/how-to-upload-photos#TOC-Upload-for-Picasa3-users
Permalink to here: http://j.mp/2xAoIRw =
https://blogabissl.blogspot.com/2018/06/picasa-to-google-photo-albums-after.html
–––––––––––––––––––––––––––––––––––––––––––––––––––––––––––
Special Blog entry to here:
https://blogabissl.blogspot.com/2018/06/picasa-to-google-photo-albums-after.html#Picasafilm
An idea: Make a Film with the Album’s Pictures, in Picasa, and upload that.
You begin by selecting your album within Picasa and hitting the third icon, the one like a film. It offers »Fotocollage erstellen«, make a foto assembly, something like that.

You’ll get a lot of options. I exported, see below, the “full film” (»Ganzer Film«) and got a 1.8 MByte 16 second WMF-file (“Test.wmv”) in a folder “Films” (or videos?) within the folder with the pictures – the current folder used by Picasa.

with Youtube, https://youtu.be/tF-GDk4LZAI,
even with Google photos: https://photos.app.goo.gl/ColeFfjFRbWjum6f2
Watch and see.
Finally an ad for Picasa’s shortcuts, from https://support.google.com/picasa/answer/66969?visit_id=1-636636377983915379-1768087397&rd=1:

1 Kommentar:
Thanks a lot Fritz, but a few remarks of course.
1. It is not necessary to create an album unless you have a very complicated selection in different folders.
2. It is not necessary to save edits in the folder, because exporting creates copyfiles in which the edits are included. Captions & keywords are automatically saved in the files.
3. The default location of the exported folder is \Pictures\Picasa\Exports\name of folder or album in which the pictures are selected. A bit deep in the structure, but it is wise to keep standards unchanged.
4. In case the order in Picasa is changed from chronological, it is wise to switch-on the autonumbering in the export-window.
5. It is not necessary to downsize to 1600px because of free storage anymore, but just to retain fast uploading in the size always used before. It now are the settings on Google Photos which determine if your uploads are free ("High Quality" instead of "Original").
6. Take care to switch-on Full movies if they are included in your selection.
7. Immediately delete the exportfolder after uploading to prevent confusion and garbage.
Kommentar veröffentlichen